The Dummies Guide to Configure Jenkins on Windows Machine
Jenkins is a server which executes automated tests headless. For running Jenkins on a local system we have to start the Jenkins server, OR we can also use Jenkins as Windows service. Therefore, whenever we boot Windows machine, Jenkins service will automatically start and we do not have to start the Jenkins server again and again explicitly. You can find the steps to configure Jenkins server as a windows service from the link – https://wiki.jenkins-ci.org/display/JENKINS/Installing+Jenkins+as+a+windows+service
1. Download Jenkins latest .war file for Windows from the following link: https://jenkins-ci.org/
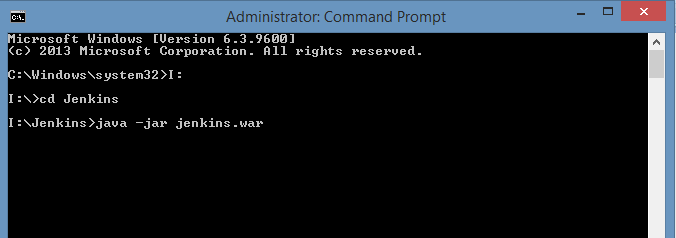
2. From the command line – navigate to the path where you have saved the .war file. In our case, we have created a folder ‘Jenkins’ and saved the .war file in it.
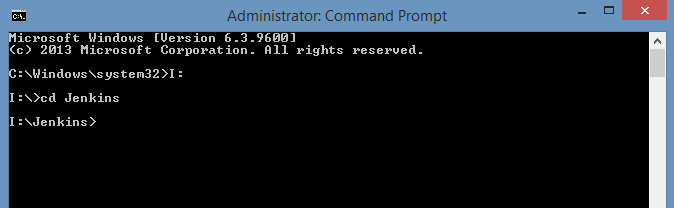
3. To start the Jenkins server – Execute the following command: java -jar jenkins.war
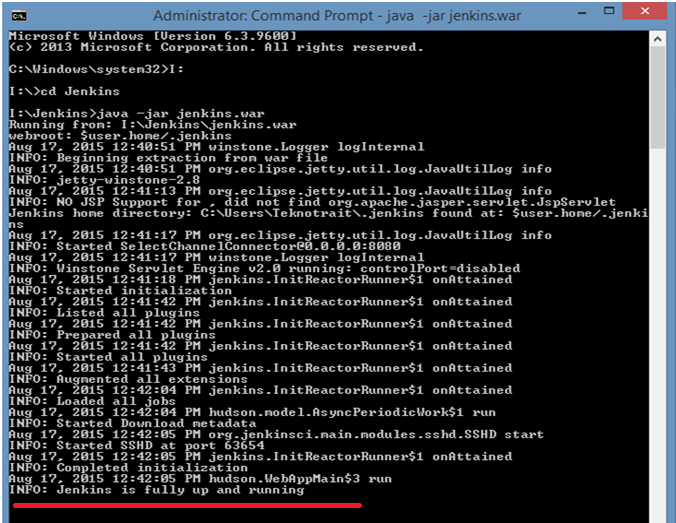
4. When you configure the Jenkins for the first time, it will load many things, and it will extract the .war file as shown in the below image.
Look for the message – “Jenkins is fully up and running”.
5. Once the metadata is downloaded, you can open the browser and launch the following URL: localhost:8080 (in any other case if you have other service installed on 8080 port), you will be redirected to the next page with no jobs on the Dashboard.
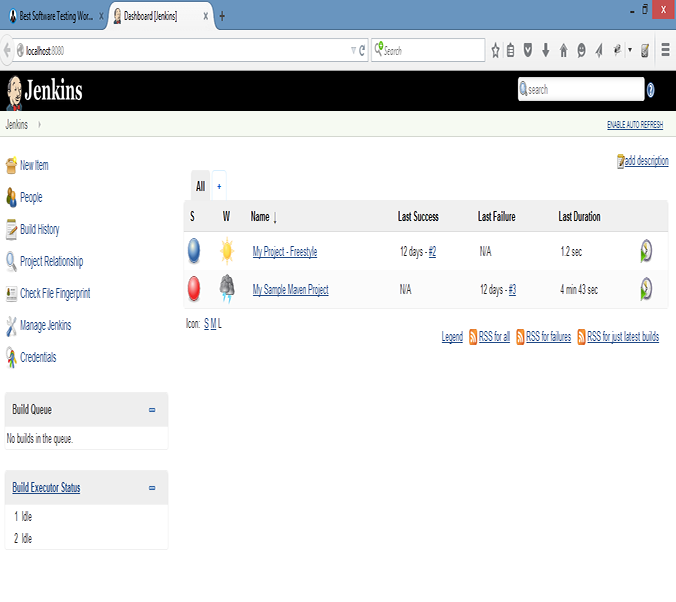
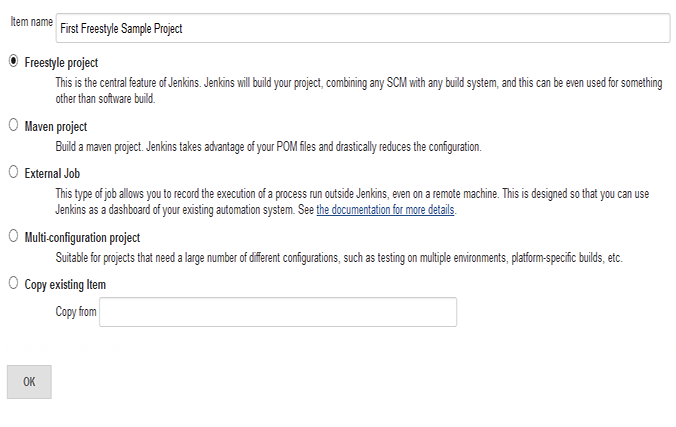
6. Click on ‘New item’ from the left panel and name it as ‘First freestyle sample project’.
Select ‘Freestyle project’ from the available options and click on ‘OK’.
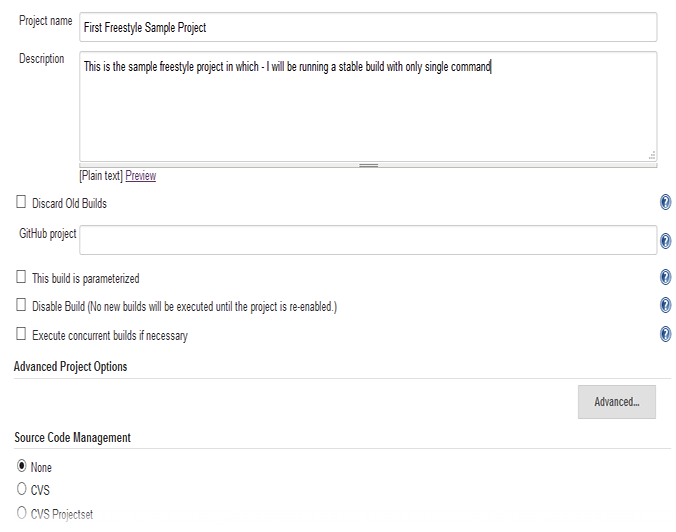
7. On Clicking ‘OK’ user will be redirected to the ‘Configuration’ page for that particular build.
8. Click on – Add build step and select ‘Execute Windows batch command’.
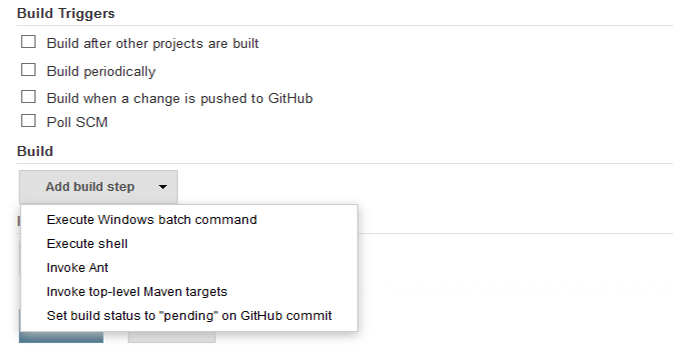
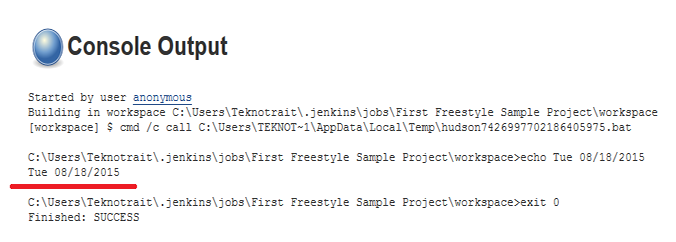
9. Write any Windows command which you wanted to run as shown in the screenshot Example: echo %date%
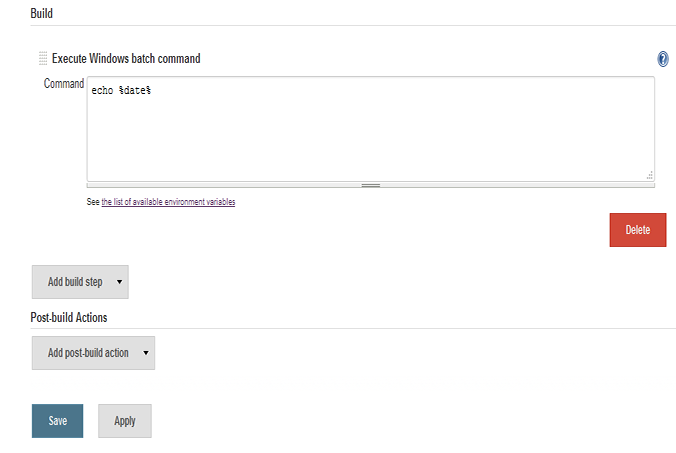
10. Click on ‘Apply’ and then on ‘Save’ button to save the configuration for the following Job. The user should redirect the user to the below Project page.

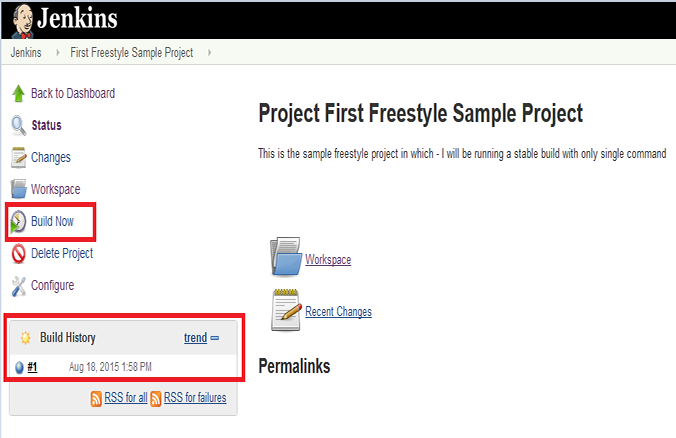
11. Click on ‘Build Now’ button from the left panel, and you will see a build execution in progress as shown.
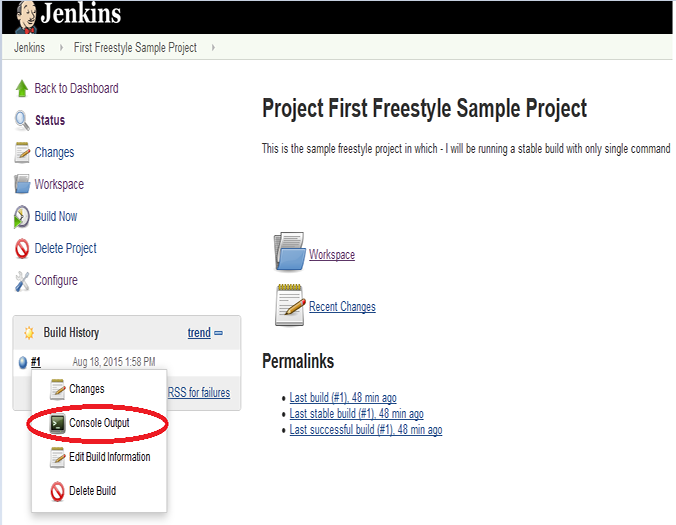
12. You can start watching the console output for this build by clicking on the ‘Console Output’ option, as shown below.
You should now be able to see the logs and output in the Console output section.
In this case – we are printing – ‘Current Date’ – hence it is displayed in the console.