Making Parameterized Build on Jenkins in the right way
Pre-requisites:
- Java installed in your system where Jenkins server will run.
- It will be useful to have Maven installed in your system where Jenkins server will run.
- If you are going to use Git, GitHub, Bitbucket as your source code repository then Git should be installed in Jenkins server. You can Download Git from here. Also, make sure you have set executable Git path (It will generally \bin) to your PATH environment variable.
Setup Your Jenkins Server:
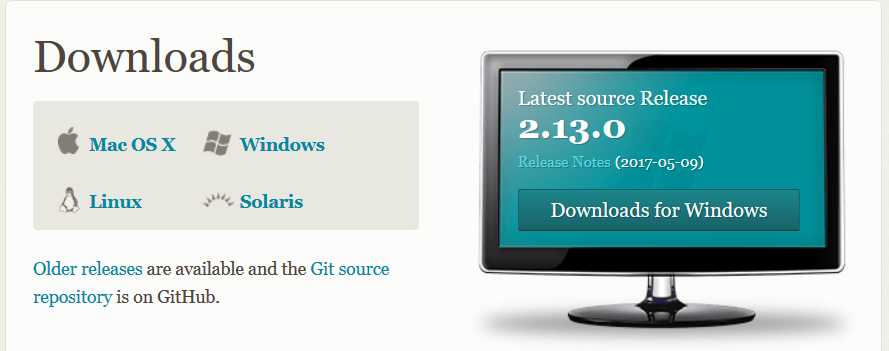
- Download jenkins.war file from the website and save it inside a folder. For example, we have saved inside F:\Softwares\Jenkins folder.
Now go to the respective folder through command prompt and execute the following command:
java –jar jenkins.war. On successful execution, you will see “Jenkins is fully up and running” log. Also note Admin password to setup your Jenkins server, in our case it is ‘8e7a77318f9d4aa39f241c5ef5277fb8’. Refer below snapshot :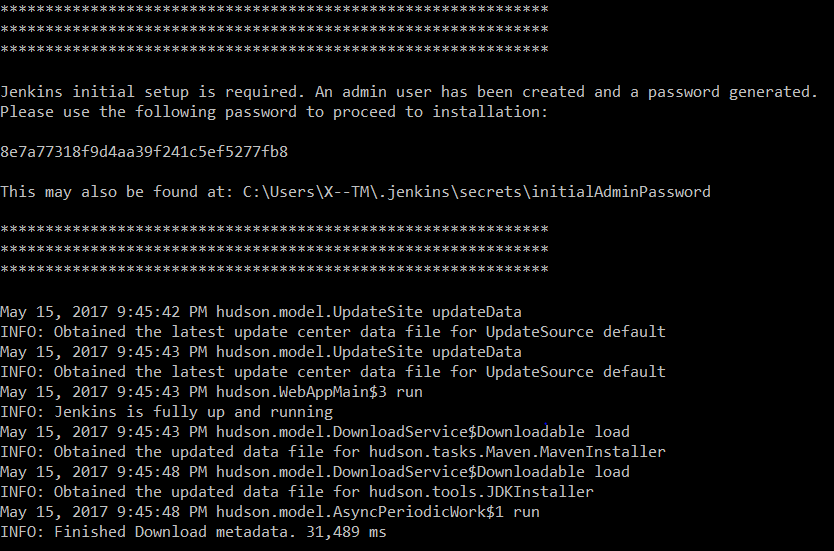
- Now open any browser and navigate to “localhost:8080” page. You will see a similar page :
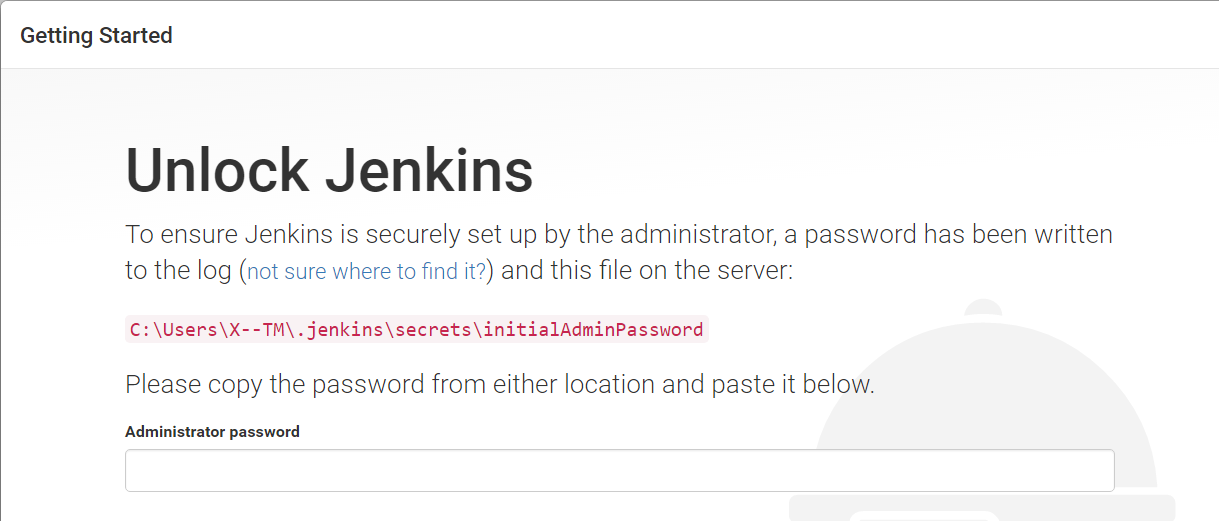
- Now enter your Admin password on “Unlock Jenkins” page which you captured from the command prompt (in our case it is “8e7a77318f9d4aa39f241c5ef5277fb8”) and then “Continue”.
- Now you have to select plugins for your Jenkins server. Click on “Select plugins to install” option.
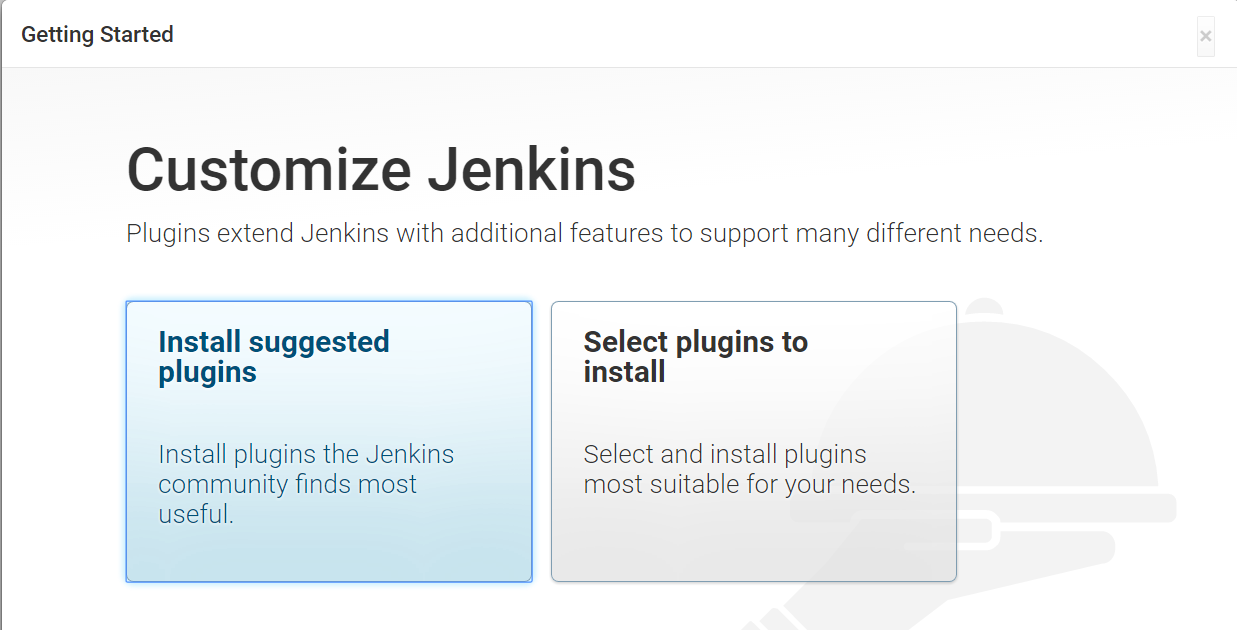 If you select “Select plugins to install” then by default suggested plugins will be selected. In this section install three more plugins :
a. Dashboard View

b. Parameterized Trigger plugin
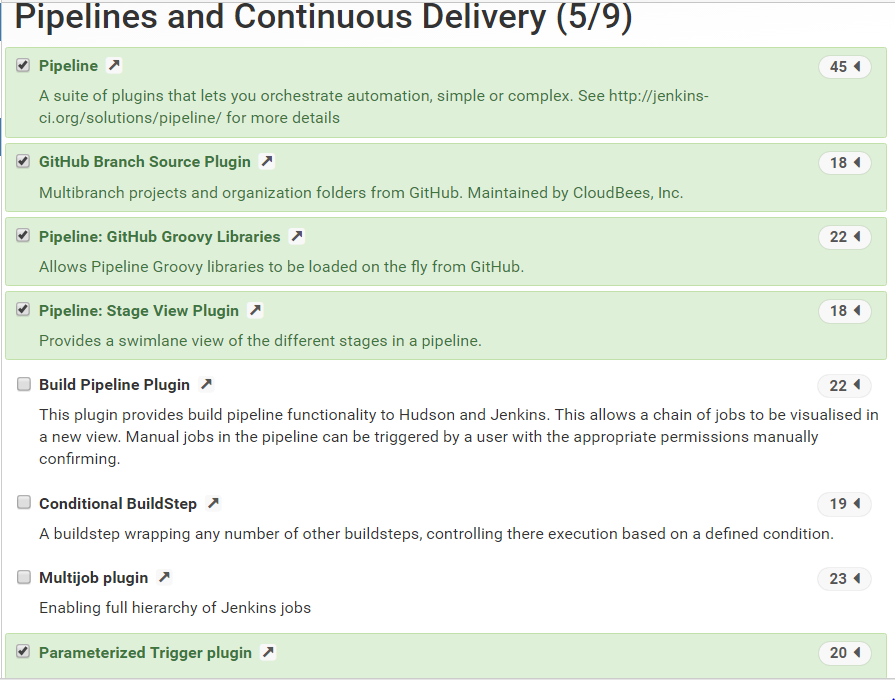 c. Bitbucket Plugin (As we have selected Bitbucket Repository for build source code, you can select another plugin based on your code repository.)

Now finally click on Install to install your desired plugins.
NOTE: You may encounter Unable to connect issue. You can try with Retry option.
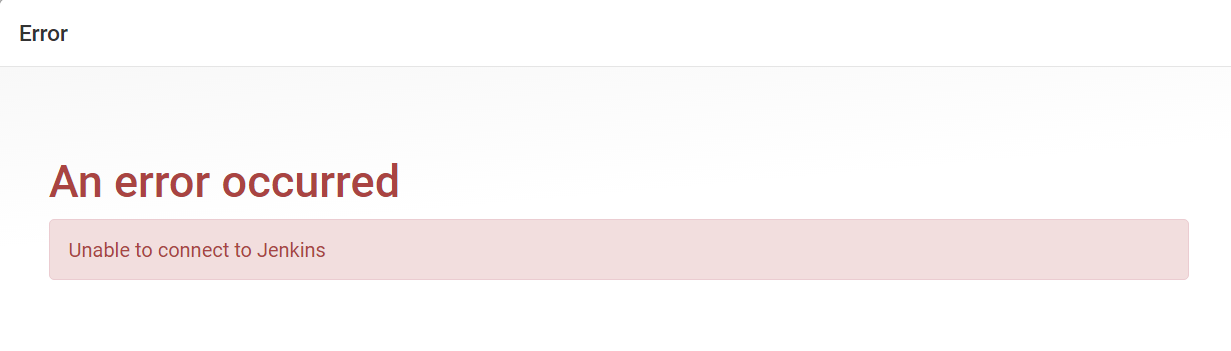
If the problem persists, stop your Jenkins server from the command line by pressing Ctrl + C and restart again. Now follow step 2 and then enter your Admin password on “Unlock Jenkins” page which you had captured earlier from the command prompt (in our case it is “8e7a77318f9d4aa39f241c5ef5277fb8”) and then “Resume”. Now select your plugins and install them.

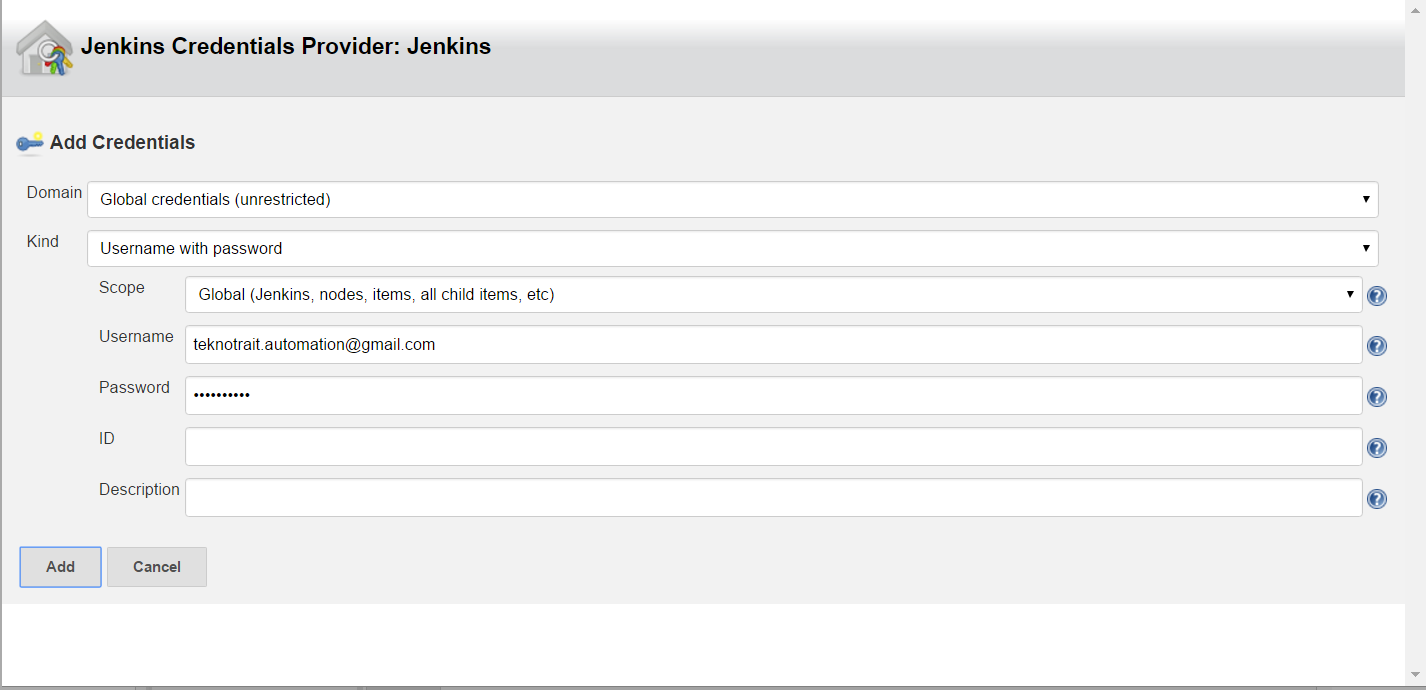
- Now, setup your credential and click on “Save and Finish” button.

- On successful setup you will be navigated to the following page.
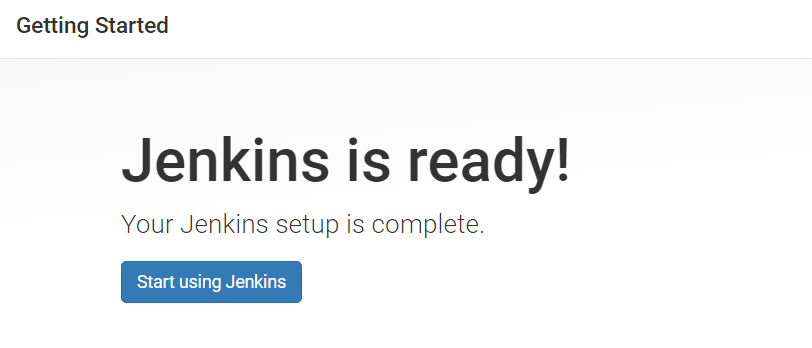
Finally, click on “Start using Jenkins” and you will be redirected to Jenkins Dashboard page.
Configure Global Tool and Additional Plugins:
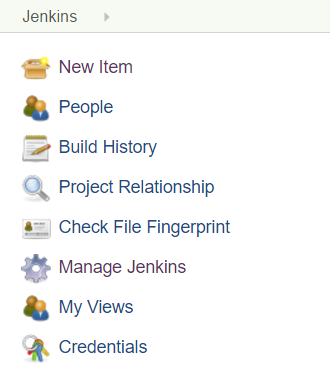
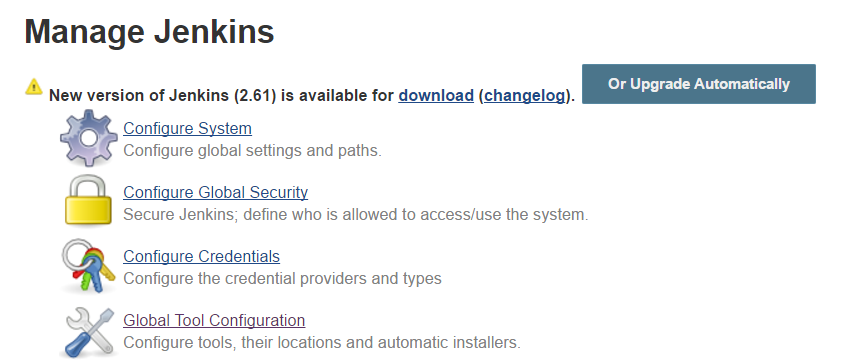
- First, we have to setup the Global Tool Configuration. Click on Jenkins (under header) > Manage Jenkins > Global Tool Configuration.
Now In this page configure your JDK and MAVEN.
i) JDK: Scroll to JDK section and click on “Add JDK” button. Enter JDK name. Uncheck install automatically option and enter JAVA_HOME environment variable value. 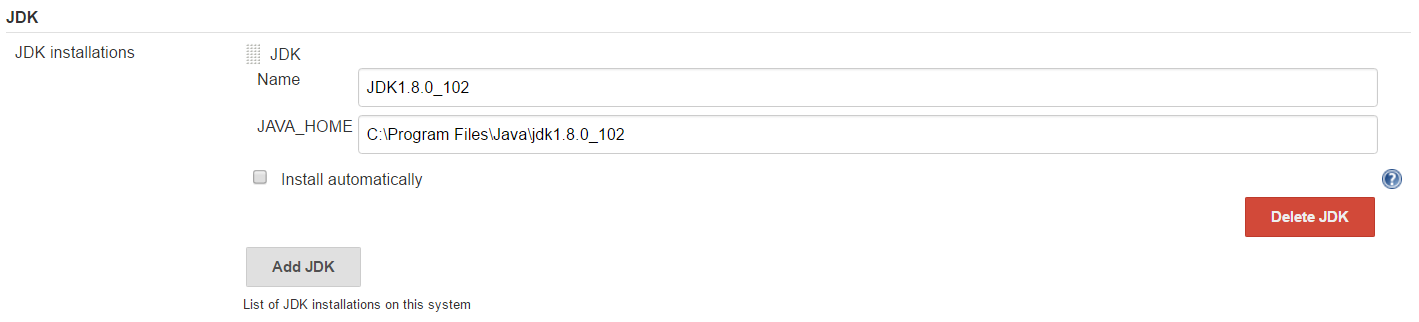
If you want to use different java version for your project then Uncheck install automatically option and enter the appropriate value for the requested field and then click on the “Save” button to save your java configuration.
ii) Git: Go to Git section (As we are using Bitbucket as our source code repository) and enter Git name. Uncheck install automatically option as you have already Git installed in your system and set “Path to Git executable” field to your Git executable application and click on “Apply”.

iii) Maven: Scroll to Maven section and click on “Add Maven button”. Enter Maven name. Uncheck install automatically option if you have already Maven installed in your system and enter MAVEN_HOME environment variable value.

After that click on the “Save” button.
- Now go to Manage Jenkins Page and click on “Configure Global Security”. Here Uncheck “Prevent Cross Site Request Forgery exploits” option (If you have crumb issuer then no need to uncheck it) and click on “Save” button.

- Now again from Manage Jenkins page click on the “Manage Plugins” option –
 You will redirect to the ‘Plugin Manager’ page. Click on the ‘Available’ tab and search with ‘build with parameter’. Check the “Build With Parameter” plugin and click on “install without restart” button.
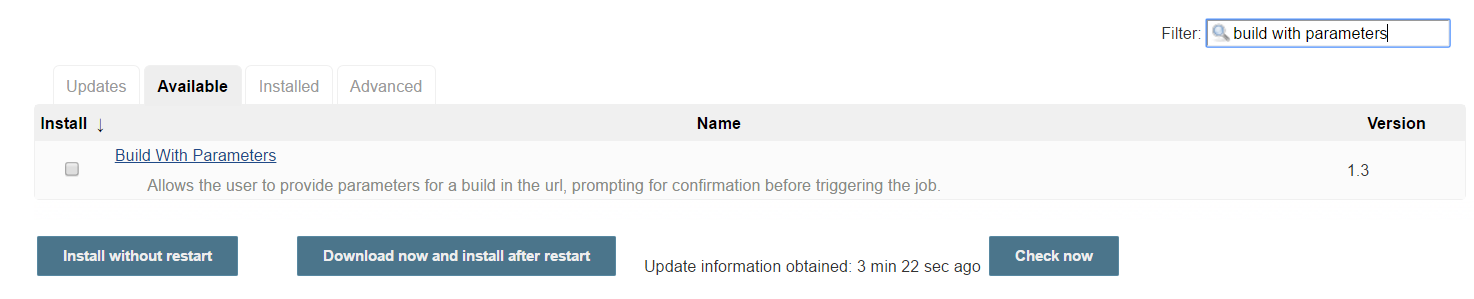
Once the installation is done click on “Go back to the top page” link.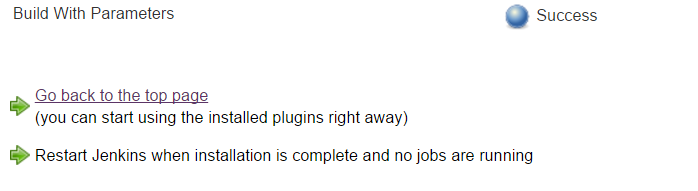
Create a Jenkins Job:
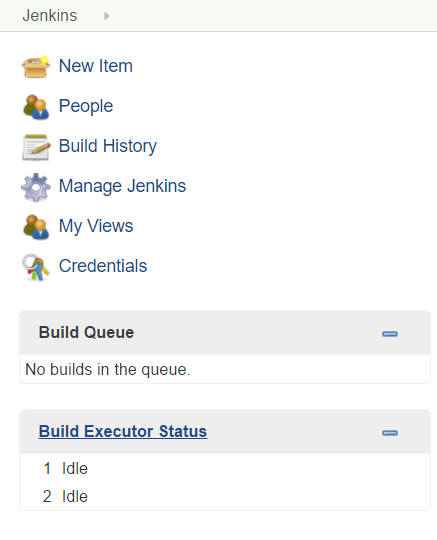
- Now go to Jenkins dashboard page by clicking “Jenkins” under the header and Click on “New Item” from the left menu panel.
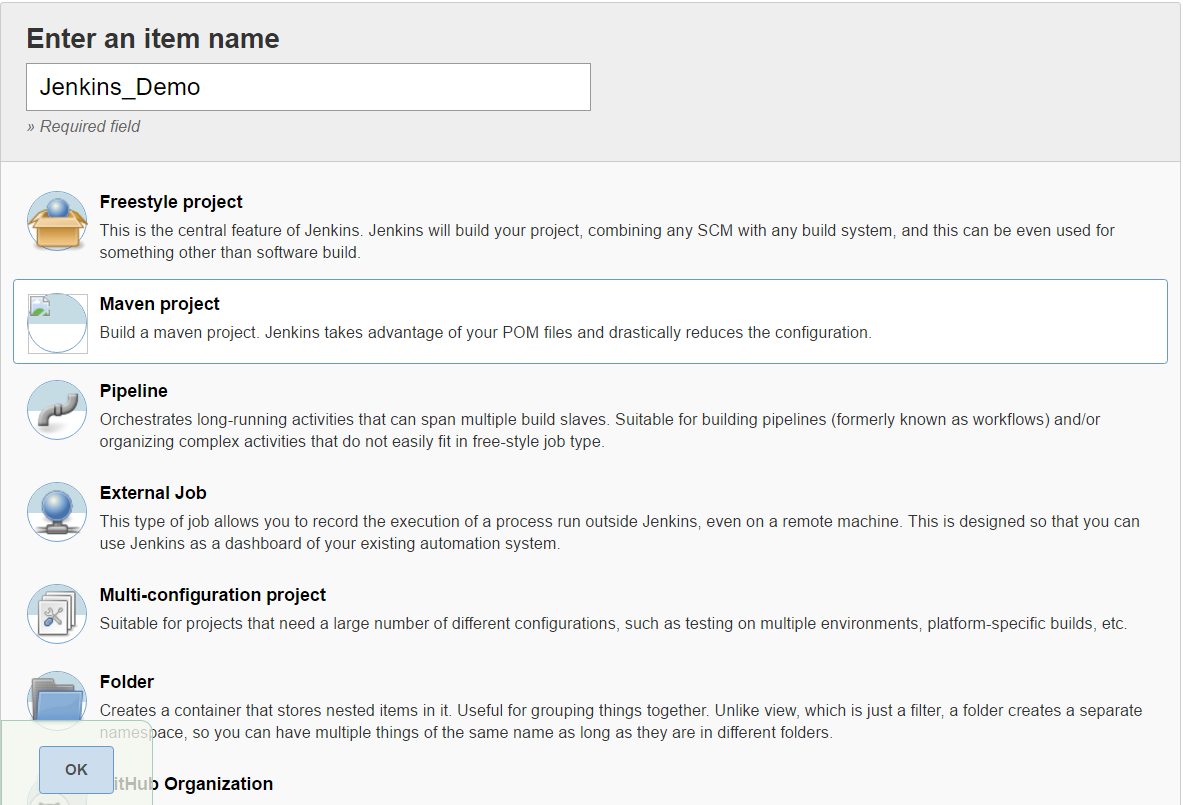
- Enter your Jenkins job name and select Maven project (As we are using maven project, you can select as per your project type) and then click on “OK”.
- Now you have to configure your Jenkins job. First under General section check “This project is parameterized” option and then select String Parameter option by clicking the “Add Parameter” button.
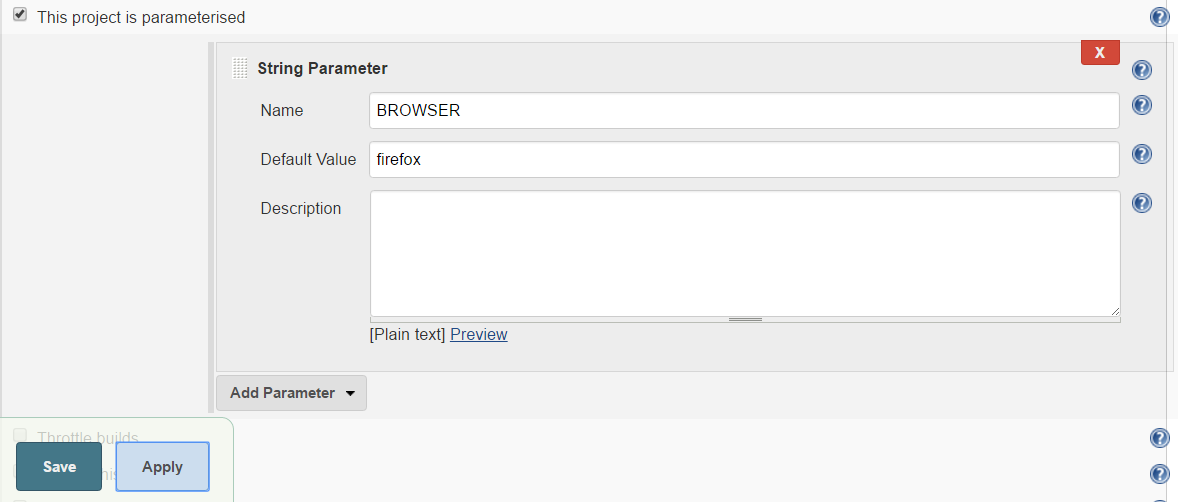 Enter Your parameter name (In my case BROWSER) and default value (In my case Firefox) and click on “Apply” button.
 - Go to Source Code Management page and select your repository (As we are using Bitbucket I have selected Git) and enter your repository URL and add your credential.
 Now Select your credential and branch and click on “Apply”.
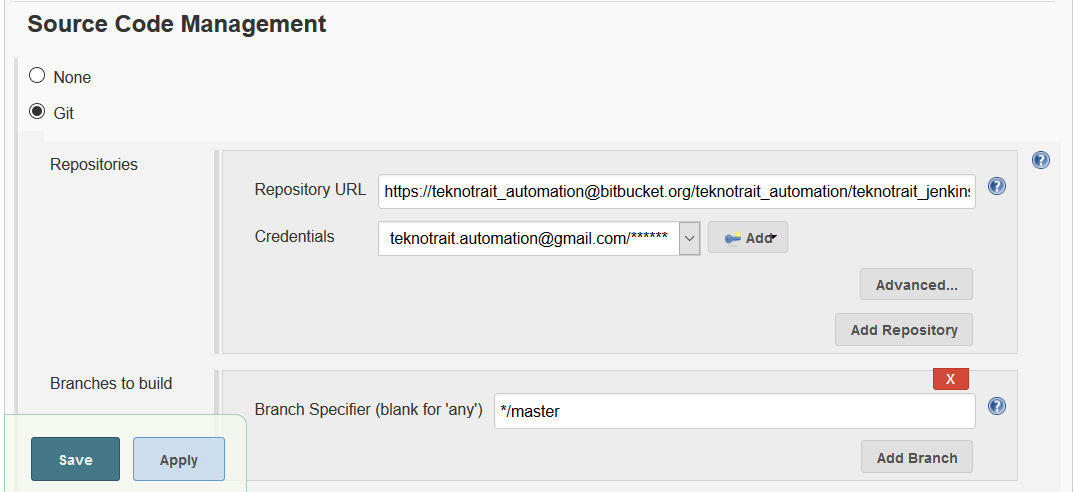 NOTE: You might face “Failed to connect to repository” error, to resolve it check Git is installed in your system or not. If It is installed then make sure your Git executable path is correct under Manage Jenkins > Global Tool Configuration.
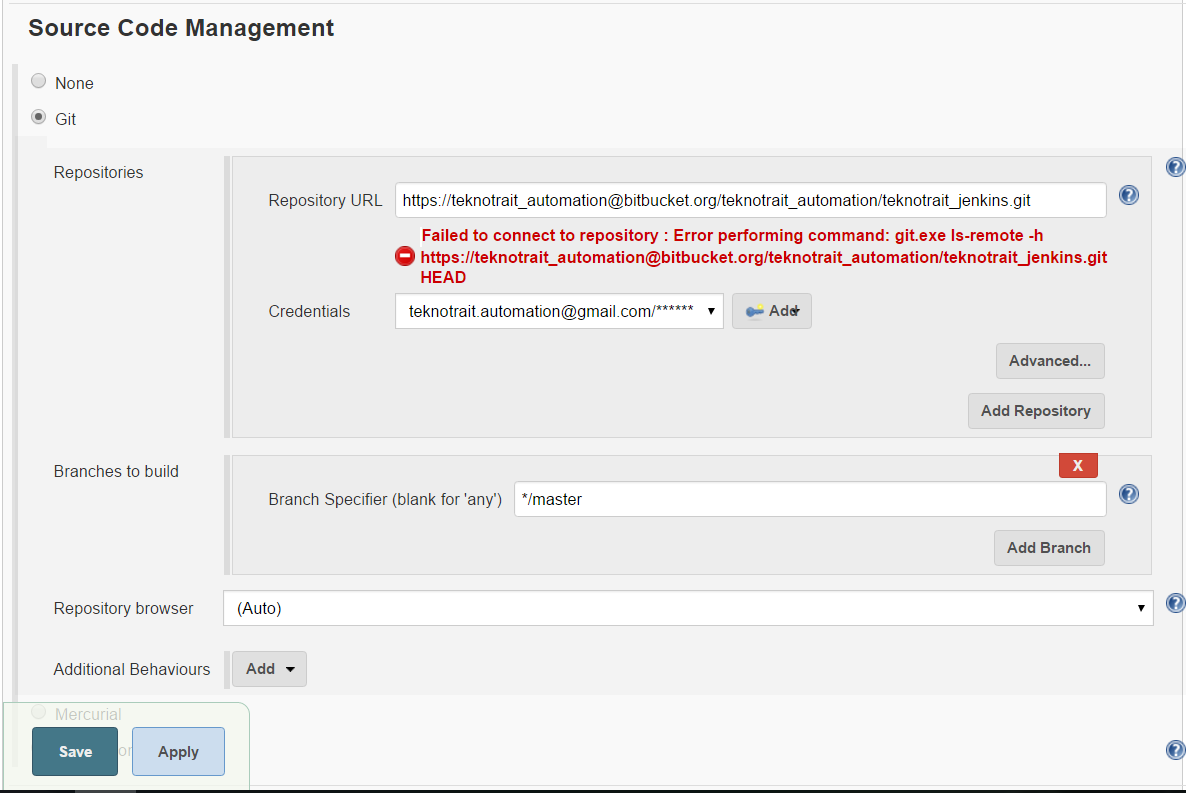
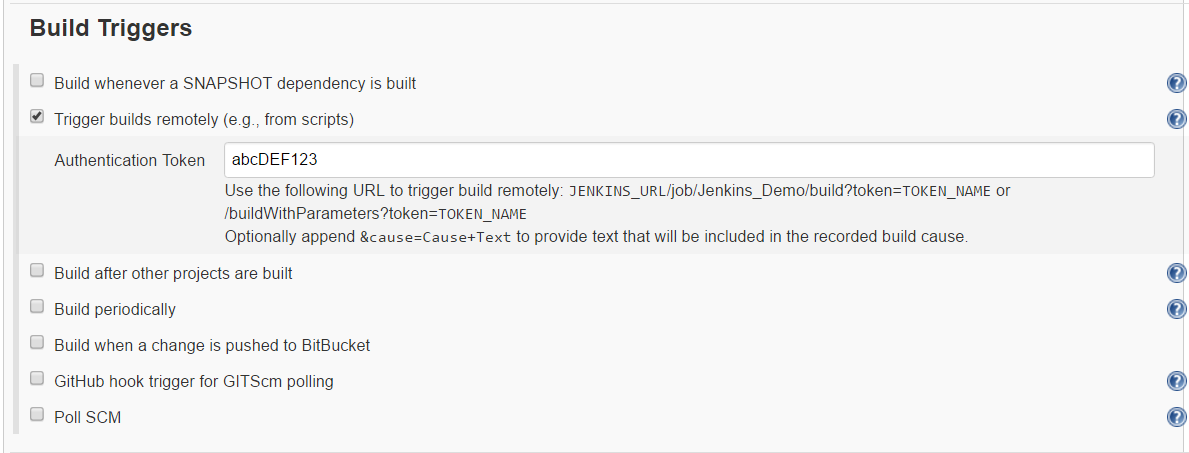
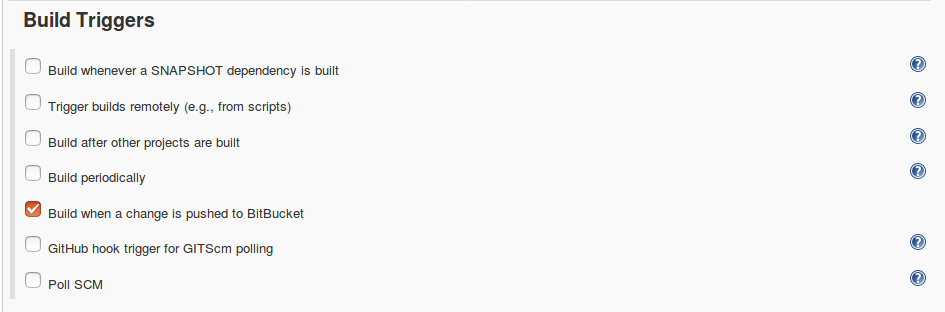
- Now go to the ‘Build Triggers’ section and checked ‘Trigger builds remotely (e.g., from scripts)’ option and enter your ‘Authentication Token’ (In my case I have entered abcDEF123 ).
Now click on the “Apply” button. - In this step go to Build section and setup your root pom.xml file and maven goals with option (In my case ‘clean test -DBROWSER=”$BROWSER”’ ).

- Now You can choose your Build trigger option from the “Build Triggers” section. We have chosen “Build when a change is pushed to Bitbucket”. You can select different build trigger option as per your requirement. However, you can trigger Jenkins job through a web interface as well.
 Now click on the “Save” button.
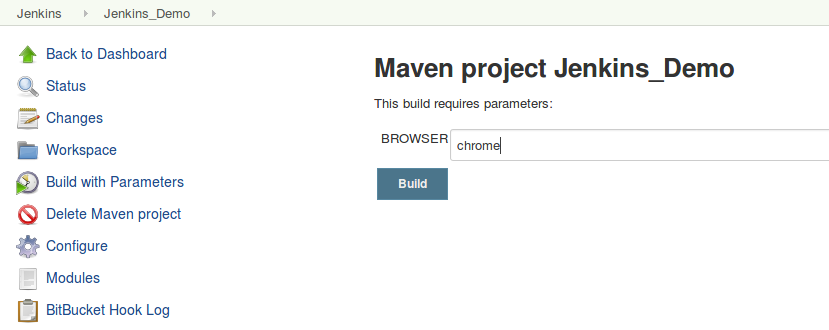
 - To execute the Jenkins job from Jenkins web interface first go to respective project workspace and then click on “Build with Parameters” option from left panel. After that, you will be asked to choose/set parameter value (In my project I have set BROWSER parameter.) Select or set your parameter value (In my case I have set chrome ) and click on the “Build” button.
- You can see your Jenkins job is executing from “Build History” panel.

Integrating Custom Report (Extent Report) With Jenkins:
- Go to your Manage Jenkins > Manage Plugins and install HTML Publisher plugin
Run your Jenkins server with the following command: java -Dhudson.model.DirectoryBrowserSupport.CSP=”” -jar jenkins.warNOTE: You might face an issue with extent reporting (e.g: Report page is shown with broken UI) because of the ‘Content-Security-Policy’ which is introduced in Jenkins from v1.641, It is blocking the inline CSS, JS Ajax resources to loaded.Reference:https://wiki.jenkins-ci.org/display/JENKINS/Configuring+Content+Security+Policy#ConfiguringContentSecurityPolicy-HTMLPublisherPlugin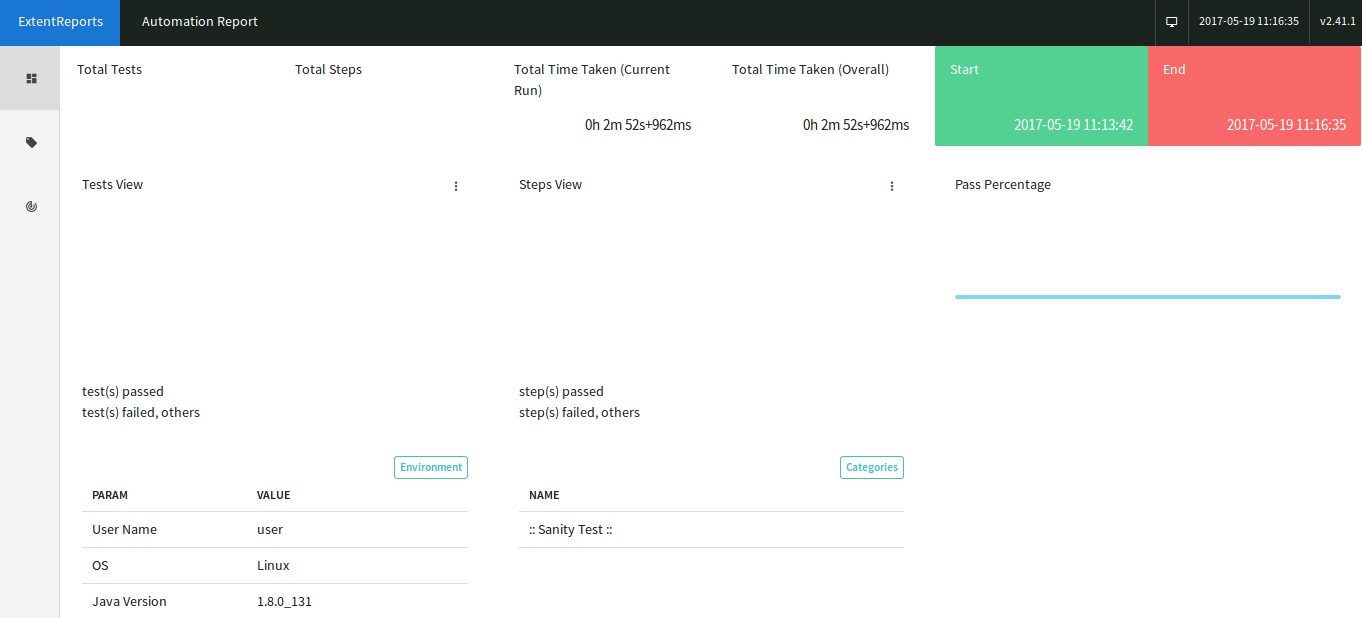
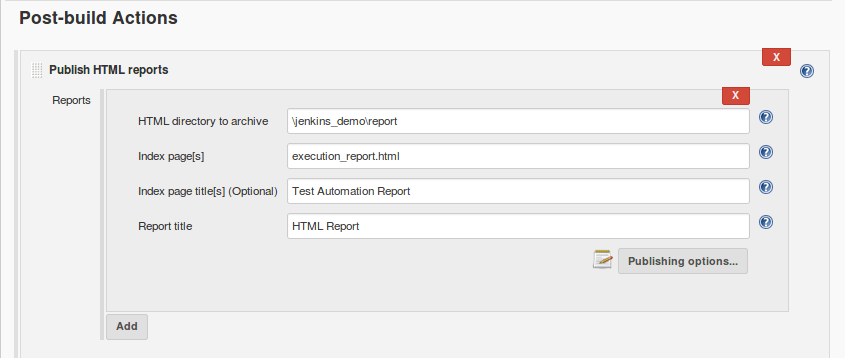
- Now go to your job configuration page on Jenkins and scroll to the “Post-build Actions” section. Select “Publish HTML reports” from “Add post-build action” drop-down.
- Enter the path of the directory from which report will fetch on “HTML directory to archive” input field. In our case its under ‘\jenkins_demo\report‘.
- Now enter the HTML file name for the report into “Index page[s]” input field (In my case ‘execution_report.html’). Enter report title into “Report title” field (In my case its HTML Report). Finally, save your configuration by clicking on the “Save” button.
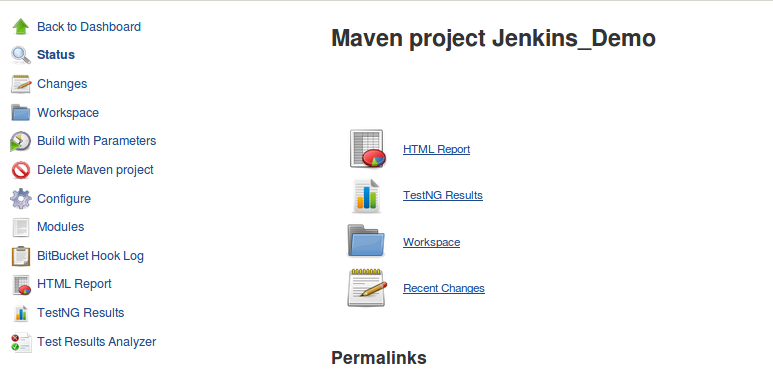
- Now make a build from the left menu panel. After execution of Jenkins job, you will be able to see a link to your HTML Report will be displayed on Job dashboard.
You can check details of execution by clicking the same.
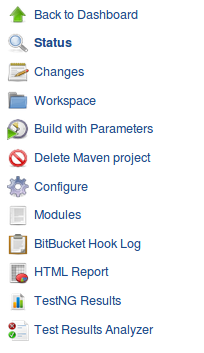
- To check execution across the build, you can use the Test Analyzer plugin. First, go to your Manage Jenkins > Manage Plugins and install Test Results Analyzer Plugin and TestNG Results Plugin (as we are using TestNG framework).
- Now restart your Jenkins server and go to your job configuration page on Jenkins and scroll to the “Post-build Actions” section. Select “Publish TestNG Results” from “Add post-build action” drop-down.
- Enter “**/testng-results.xml” on TestNG XML report pattern input field. You can set advance settings by clicking “Advance button”, otherwise leave the advance option to its default value.
- Now make a build from the left menu panel. After execution of Jenkins job, you will be able to see a link to your “TestNG Results” will be displayed on Job dashboard, and a link to “Test Results Analyzer” report will be displayed on the left menu panel.
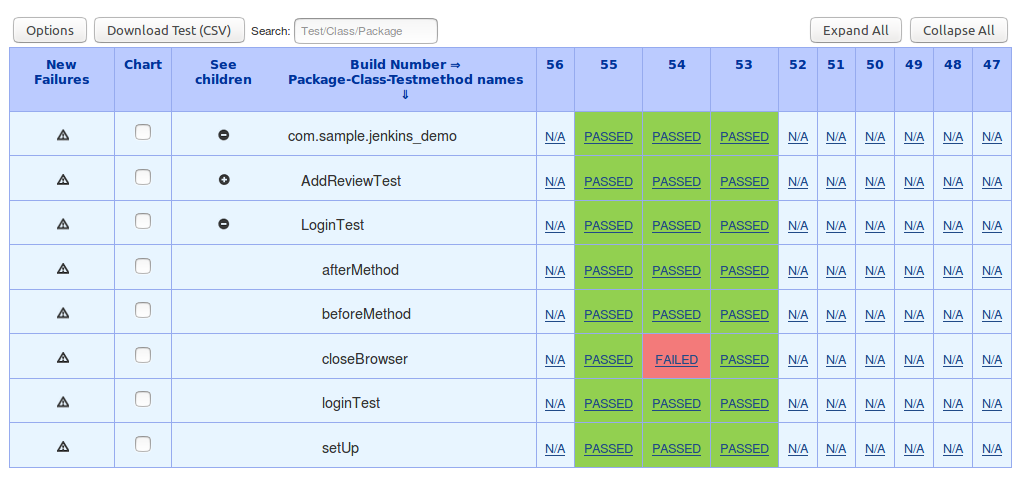
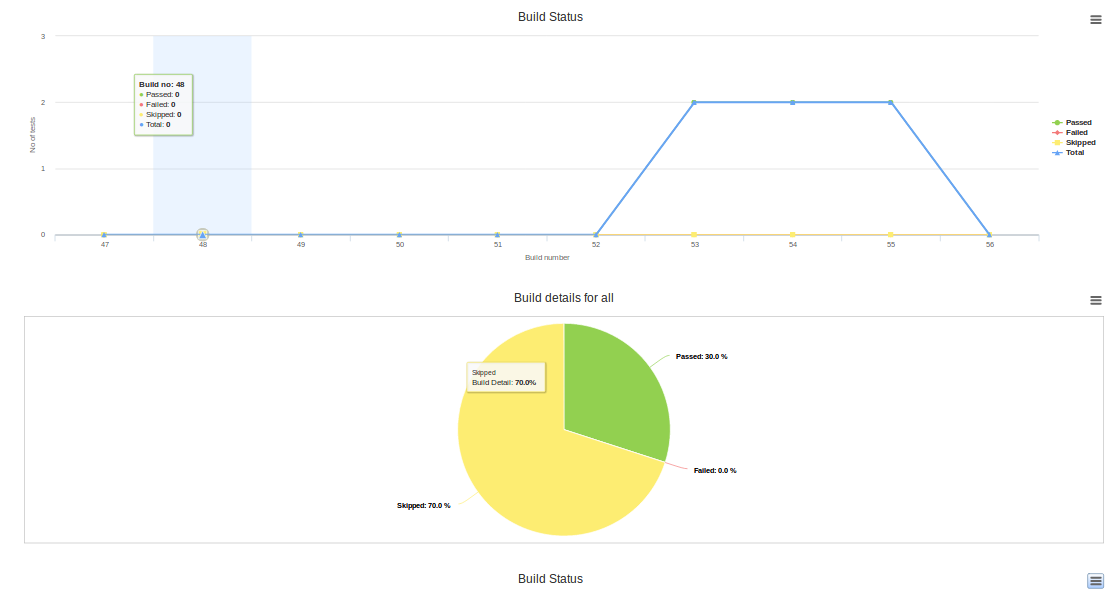
- You can check the build result by clicking on “Test Results Analyzer” link.